

Drywalls
Where are the pictures?
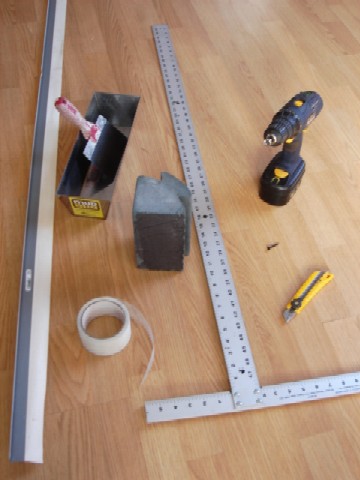
Somehow I managed to have no pictures of this remarkable stage in the house construction. See some tools below that I used for drywalling and plastering.
Insulation
I noticed that I had no chapter about the insulation. Let me briefly describe it here. Walls were insulated with an R-20 fiberglass batt, and a ceiling with R-35. Poly sheathing was applied on top of the batt to stop any moisture from getting inside walls or a ceiling from the house. All poly overlapping and edges were sealed with an Acoustics sealant to ensure air tightness.
Ordering drywalls
As the case was with siding, ordering the drywalls from a specialized distributor was much cheaper than from the Home Depot, for example. I had called about five of them asking for a quote. Then I made another round of calls announcing the competitors' offers. Bargaining for every quarter for about 150 gypsum drywalls, most of which were 1/2" x 4 x 10 and some 1/2" x 4 x 12 feet, did make sense.
Delivery
Another good reason for ordering from a specialized drywall distributor was a delivery. They either included it in each panel's price or quoted it separately.
I couldn't imaging trucking 150 drywalls from the Home Depot and unloading them one by one even after I had done so with the roofing shingles.
It took two men with a crane and a dolly about two hours to distribute all the panels around the house.
Looking at 20 to 30 drywalls laying in one place on the second floor did scary me. I recalled a story told me by one of my friends. A builder unloaded drywalls in his newly cemented basement. The concrete floor had not only cracked but also sagged, so they had to cement almost the entire basement again.
Of course, nothing happened to my house. The piled drywalls were more like a living load test for each room's floor. Beams and joists successfully passed the test.
Vertically or horizontally
Most drywall contractors install a drywall horizontally because houses that they build have 8-foot ceilings that require only two panels. Therefore, there is only one horizontal seam to plaster. The drawback of course, is that the edges of the panels are not supported. Depending on stud spacing it may not even be a problem. Even with 24" spacing it is not that bad.
The 10-foot ceiling made a difference as I would have had to deal with two seams if I had installed the panels horizontally. Some walls that were under 12 feet, I indeed drywalled in this way and avoided vertical butt (ungrooved) joints entirely.
People who haven't finished their basements may not know that only the longer side of a drywall is thinner. Hence, joining drywalls along this side forms a nice groove for easy plastering. When joining shorter sides, there is no groove and a joint is more difficult to hide, though not impossible.
Those walls that were longer than 12 feet, I drywalled vertically and thus had no unsupported horizontal seams or no seams without a groove for that matter.
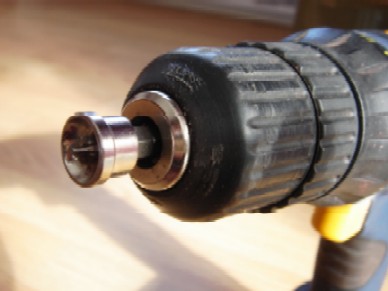
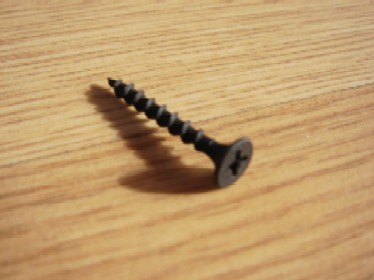
Drywall screws and bits
I used cordless drill with a drywall bit. The drywall bit is an excellent invention as it drives a screw head to a perfect depth without damaging a drywall. I spaced screws about a foot apart.
Plastering
The goal was to install drywalls on the first floor, finish one bathroom, buy appliances and move in as my debt had become substantial and I could't afford paying the debt and the apartment rent.
Therefore, after the first floor had been done, I began plastering the utility room, so that I could install a water heater and a softener. Another reason for doing the utility room first was to practice plastering prior to doing the rest of the house.
The theory of plastering is simple. You either use a paper or fiberglass tape and a plaster. I chose the self-adhesive fiberglass tape and ready-mix mud sold in 20 kg buckets. Most contractors prefer making their own mud by mixing a dry plaster pouder with water. Such plaster doesn't shrink after it dries out. The disadvantage of it is that you have to use it quickly and throw away the remainder after a certain time. Working under a constant time preasure didn't appeal to me much, thus I chose the ready-mix.
The important thing about buying the ready-mix is to ensure that it is not old as the moister escapes from it over time making it more difficult to apply. To avoid visible shrinking, it should be applied in less amount but more times. Thinning the ready-mix with water is a no-no as it makes a plaster to shrink considerably. There are so called topping mixes available on the market to use for the last layer. They claimed to spread smoothly and sand easily. Honestly, I didn't notice much of a difference between the specially formulated topping mixes and the regular mud.
Drywall joints usually require three layers of plaster. The first one is about 4" wide, the second one - 6", and the last one 8 to 10". First, I taped a seam with a self-adhesive fiberglass tape, then applied the first layer of plaster. I opened windows and turned on my big fan. In summer it got dried in a few hours.
Sanding
The most unpleasant job in drywalling is sanding because it is messy. To minimize the dust, I used another cool invention, a sanding pad with holes and a hose attached to a shop vac. Sanding is usually required prior to an application of the next layer of plaster. Hence, it's not just messy, it's messy big time.
Corners
90° inside corners can be done with a fiberglass tape. Outside corners require metal or plastic beads. The metal beads have paper edges. The corner beads are available straight solid or in rolls, both metal and plastic.
I think I tried most of them, if not all. They all work and it is only a matter of an individual taste that can distinguish one from the other. For example, I preferred the roll type for 135° outside corners as I couldn't find the straight solid ones. I used the roll type beads for 135° inside corners as well. Opposite to a fiberglass tape, plaster is applied first for the metal or plastic beads.
For 90° outside corners I used round metal beads. They look much better than straight corners. I heard that contractors charge much more for the round corners but I don't understand why. They cost the same as the straight corners and it takes the same amount of time to install them. Go figure.