

Framing the first floor
Prior to backfilling
The foundation walls must have been tied prior to backfilling, otherwise they might have collapsed under the earth pressure. Therefore, I had to build the first floor first.
Here are the drawings of the first floor beams and joists.
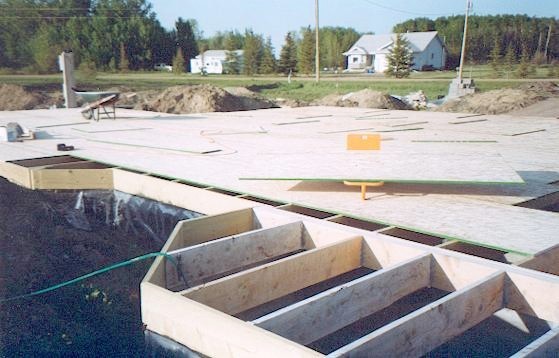
I anchored 2 x 8" treated lumber to the foundation walls with bolts embeded into concrete laying the lumber into wet cement but separating the lumber from cement with 10 mil poly. It should have protected the lumber from moister. Cement was meant to produce tight seal between the soil lumber and the wall. This piece of lumber was to support the rest of flooring.
As you can see, I used 2 x 10" lumber for beams and joists. I also used joist hangers that allowed me to have beams and joists at the same level.
I should have noticed that everything was nailed together with galvanized spiral nails except hangers where I used special hanger nails that were also galvanized. This was important measure against corrosion.
Flooring
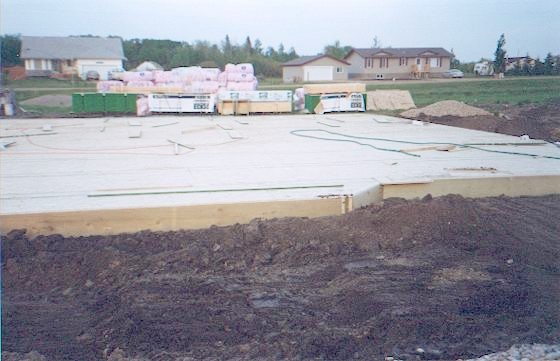
I used 3/4" OSB for flooring and 1 3/4" screws. I had seen contractors with pneumatic nail gun shooting two nails a second. Fast? Yes! Squeaky after a few years? Likely! The gun nails are not even spiral, so after a while they might get loose.
I even applied PL-400 adhesive to every OSB joint for extra protection against squeaking.
Backfilling
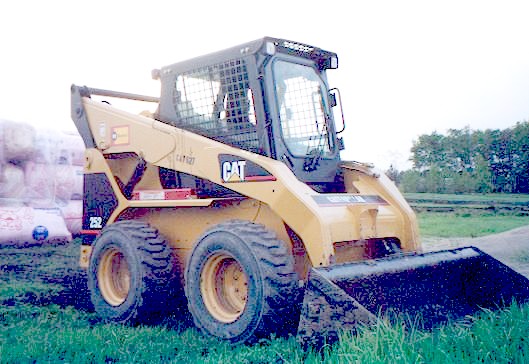
Backfilling was a CAT front loader job. The advantage of it was gentle backfilling. It dropped dirt down along the walls as oppose to bulldozer that would have pushed it into the walls.
You may see the insulation batt at the background. I ordered lumber, OSB and insulation for the entire house from The Home Depot as they agreed to deliver everything to me for just $75. A salesman hadn't realized that it took them three trips to bring all this stuff. Oh well, they must have made enough profit from such a big order anyway.
Framing
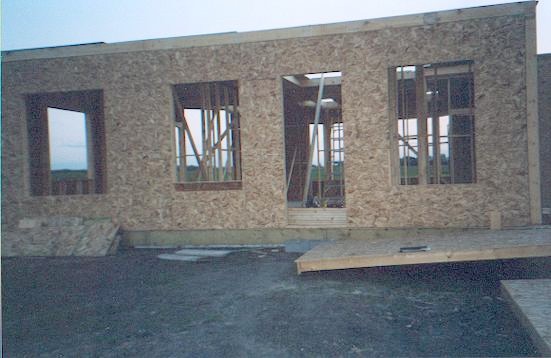
The finished floor had given me a perfectly flat platform for making wall sections. I tried not to make them longer than 10-foot long for easy raising. I built the outside walls from 2x6" SPF-2 lumber. Inside walls - from 2x4" SPF-2. Again, I used the spiral galvanized nails. As with flooring, 1/2" OSB panels were screwed in with the corrosion resistant screws.
Raising walls
When all walls were done, I rented a couple of wall jacks that were designed to raise walls. It was very windy day as usual and I was afraid that something might have happened when a wall was in near vertical position.
Clearly, one pair of hands was not enough. I called my friends. It occured to be much easier job for three to four men than for one with the wall jacks. We didn't even use the wall jacks after all.