

Framing the roof
Roof design
A traditional roof design had been forgotten at least in Alberta where construction people simply ordered roof trusses from a manufacture and installed them with a crane. Fast and simple. This idea had spreaded so widely that others began manufacturing complete houses and delivering them by trucks. All you did was erect a basement and then unload your house onto it. Done. Ready to move in the next day.
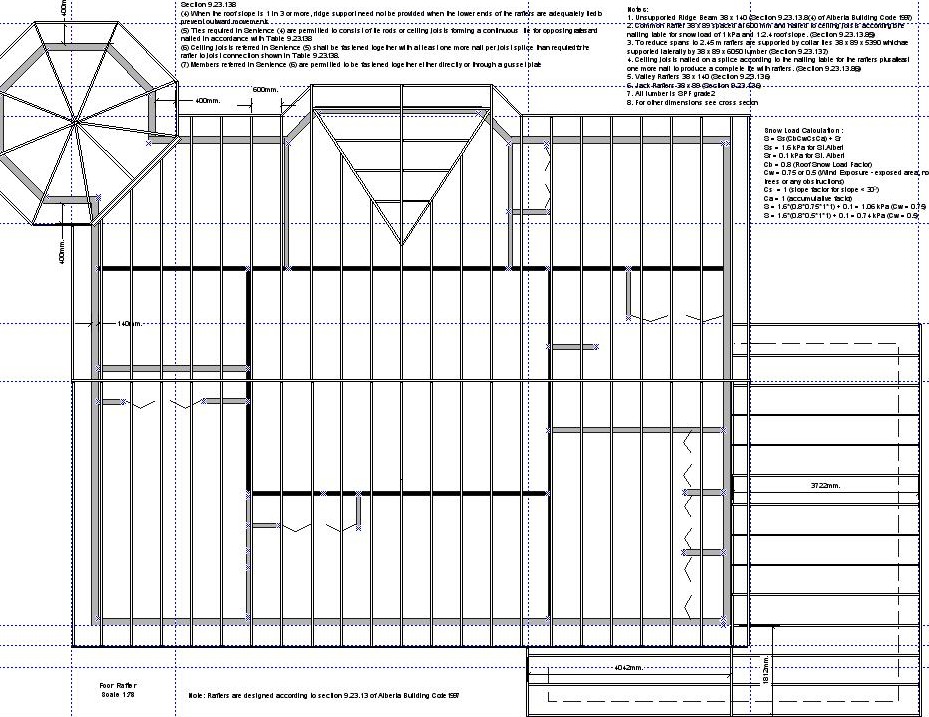
Roof trusses required an approval of a professional engineer, read more money to spend on a stamp on your blue prints. I went with the traditional rafters design. I drafted the house for the maximum allowed supported roof length of 9.8 meters. "Allowed" stood for "permitted without a special engineering approval". Here is another view of my roof design.
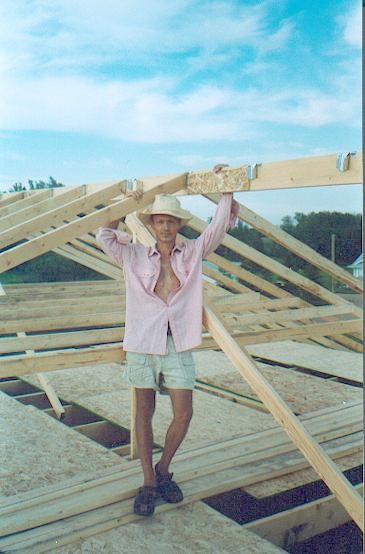
The cross-section view shows that common rafters are connected with a collar tie that effectively reduces the supported rafter length by half. All rafters were shaped at the support, nailed with 11 nails at the support as per the nailing tables and for super strength were also connected with the hurricane galvanized ties on both ends at the ridge beam and at the walls.
My roof withstood 110 km/h wind year later without any damages. Not a single shingle was blown away.
Snow load calculation
To properly size the roof rafters, one should have done a snow load calculation. Here is mine:
S = Ss * (Cb * Cw * Cs * Ca) + Sr
Ss = 1.6 kPa for St. Albert
Sr = 0.1 kPa for St. Albert
Cb = 0.8 (Roof Snow Load Factor)
Cw = 0.75 or 0.5 (Wind Exposure)
Cs  = 1 (slope factor for slope < 30°)
Ca = 1 (accumulative factor)
S = 1.6*(0.8*0.75*1*1) + 0.1 = 1.06 kPa (Cw = 0.75)
S = 1.6*(0.8*0.5*1*1) + 0.1 = 0.74 kPa (Cw = 0.5)
I calculated the snow load for two wind factors 0.75 and 0.5. Normally Cw should be 1 but in windy open areas with no trees or obstructions it is allowed to be 0.5 or 0.75. My acreage was the perfect example of such area.
Based on my calculated snow load, I used the appropriate span tables to determine the size of the rafters. According to these tables I could build the roof of 2x4" lumber. I had to order 20 feet long lumber from the lumber shop because neither Revy nor Home Depot carried one.
Roof slope
The roof slope is important for a few reasons:
- snow load
- ridge beam support
- roofing with shingles considerations - see Roofing
In my case it was 5 in 12. If it is more than 4 in 12, then the ridge beam does not need a support.
Sheathing
I used 5/8" tongue and grove OSB for roof sheathing, as usual applying PL-400 adhesive to every joint. This time it was done primarily for water proofing while the roof was under construction.
Inspection
When I was doing a framing inspection, the roof was not accepted. Everything was correct and done according to the Building Code. The problem was as I pointed above that the traditional roofing design had been forgotten and I had to remind an inspector to review certain articles from the Code to refresh his memory.